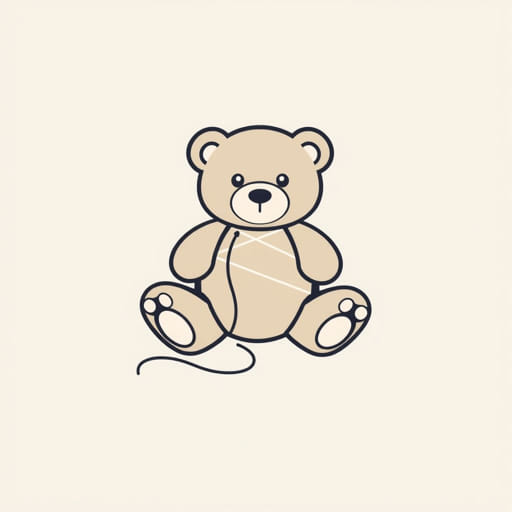
Working with a thready bear might sound unusual, but it refers to a specific craft or sewing project involving a bear figure made from threads or yarn. This kind of project combines creativity, patience, and a bit of skill, often enjoyed by hobbyists who love knitting, crocheting, or embroidery. Understanding how to work thready bear means knowing the right materials, techniques, and steps to bring this charming creation to life. Whether you’re a beginner or looking to enhance your crafting skills, this guide will walk you through the essential process of working on a thready bear.
Materials Needed for Working Thready Bear
Before starting, it’s important to gather all the necessary materials to make your thready bear project smooth and enjoyable. Having the right tools ensures better results and less frustration.
- Yarn or Thread: Choose a soft yarn or thread suitable for your bear’s size and texture. Common choices include acrylic, cotton, or wool blends.
- Needles or Hooks: Depending on your technique (knitting or crocheting), select the appropriate needles or crochet hooks matching your yarn weight.
- Stuffing Material: Use polyester fiberfill or cotton to stuff your bear and give it shape.
- Scissors: For cutting threads neatly.
- Stitch Markers: Helpful to keep track of your progress, especially when working in rounds.
- Embroidery Thread: For adding details such as eyes, nose, and mouth.
- Pattern or Instructions: Having a clear pattern or step-by-step guide can make the process easier, especially for beginners.
Choosing the Right Yarn for Your Thready Bear
The choice of yarn affects your bear’s appearance and feel. Softer yarns provide a cuddly texture, while sturdier yarns offer durability. Consider the color and thickness; lighter colors make it easier to see stitches, while thicker yarn shortens the project duration.
Step-by-Step Guide to Work Thready Bear
Once your materials are ready, follow these steps to create a beautiful thready bear. Patience and practice are key to mastering each phase.
1. Preparing Your Workspace
Set up a clean, well-lit workspace with all your materials within reach. This helps you focus and prevents losing small items like stitch markers or needles.
2. Understanding the Pattern
If you’re using a pattern, read it carefully before beginning. Familiarize yourself with abbreviations and stitch types such as single crochet, double crochet, or knit and purl stitches.
3. Starting with the Bear’s Head
Typically, the head is worked first in a round shape. Begin by creating a magic ring or adjustable loop to start your stitches in a circle. This technique ensures the head is tightly closed without gaps.
- Make a magic ring and crochet the first round of stitches into it.
- Gradually increase stitches evenly to form a round shape.
- Continue with several rounds of consistent stitches for the head size.
4. Creating the Body
The body usually follows the head, worked in a slightly larger round shape. Use increases and decreases in stitches to give the bear a natural shape, wider in the middle and narrower at the top and bottom.
- Start from the neck, attaching to the head or working separately to be sewn later.
- Use gradual increases to widen the body.
- Shape the bottom with decreases for a rounded finish.
5. Making the Limbs and Ears
Arms, legs, and ears are often made separately and sewn onto the body. These parts are usually smaller rounds or oval shapes.
- Create limbs with simple rows or rounds of stitches.
- Stuff lightly to maintain softness and flexibility.
- Attach ears on top of the head, sewing carefully to secure.
6. Stuffing Your Thready Bear
Stuffing is an important step that gives the bear its 3D shape. Use small amounts of stuffing at a time and push it firmly into corners and limbs. Avoid overstuffing to keep the bear soft and cuddly.
7. Adding Facial Features
Using embroidery thread or yarn, stitch eyes, nose, and mouth. Small black beads or safety eyes can also be used for a realistic look. Position the features carefully for a friendly and expressive appearance.
Tips and Tricks for Working Thready Bear
To improve your crafting experience and ensure a quality result, keep these tips in mind:
- Practice Stitches: If you’re new to crochet or knitting, practice basic stitches on scrap yarn first.
- Use Stitch Markers: They help you keep track of rounds, preventing mistakes.
- Check Gauge: Gauge determines the size of your bear. Match your tension to the pattern’s recommended gauge.
- Keep Even Tension: Consistent tension creates uniform stitches and a neat appearance.
- Be Patient: Complex shapes take time. Don’t rush, and enjoy the process.
Common Mistakes to Avoid
Working on a thready bear can have challenges, but avoiding common pitfalls can save time:
- Skipping Stitch Counts: Always count stitches each round to avoid uneven shapes.
- Overstuffing: This can distort your bear’s shape and make sewing difficult.
- Poorly Attached Limbs: Securely sew all parts to avoid loose limbs.
- Ignoring Pattern Instructions: Follow your pattern closely, especially for shaping rounds.
Benefits of Working on a Thready Bear
Creating a thready bear is not only a fun hobby but also has many benefits:
- Enhances Creativity: You can customize colors, sizes, and expressions.
- Improves Fine Motor Skills: Crafting strengthens hand-eye coordination.
- Relieves Stress: The repetitive motion of stitching can be calming.
- Produces Handmade Gifts: Bears make great personalized presents.
Working thready bear projects combines artistry and technique, offering a rewarding experience for craft lovers. By carefully choosing materials, following a clear pattern, and paying attention to detail, you can create a charming and soft bear that brings joy. Whether you want to make one for yourself or as a gift, the key is to practice patience and enjoy the creative process. Soon, with dedication and skill, you will master the art of working thready bear and perhaps even develop your unique style in this delightful craft.